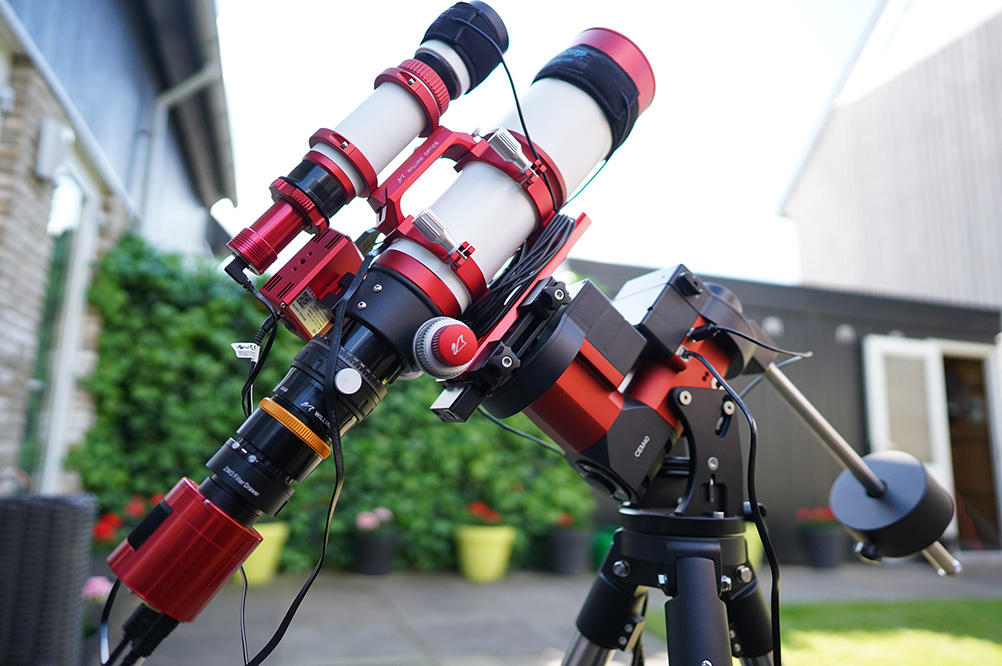
How to set up the William Optics GT81 (or similar telescopes) on an iOptron CEM40 mount for astrophotography with ASIair Pro by ZWO? This post is mainly for ourselves, but maybe it is useful for other beginner astrophotographers, too. It describes the workflow with our equipment, with some (hopefully) useful advice.
Preparations
– Have a plan for the night; select target and filter with Moon phase in mind
– Make room for the telescope in the backyard/street front during daylight
– Check the shooting direction (target visibility; sources of light pollution)
– Get out the telescope at least an hour before starting
(counterweight goes on the mount first, only then the telescope!)
– Point it to North, and check the watermark (level the tripod if necessary)
– Remove caps from the guider and the GT81, balance the telescope; caps back
– Check the cables: are they all in place?
– Make sure cables do not get stuck when the telescope is repositioned to a completely different direction
– Losen the screws of the mount axes
– Secure the extender cable powering the telescope, do not stumble in it later
– If you have one, start the WiFi repeater
Getting started with ASIair Pro
– Start the ASIair app on your mobile phone
– Check if the mount, guide scope, and main telescope are correct in the settings
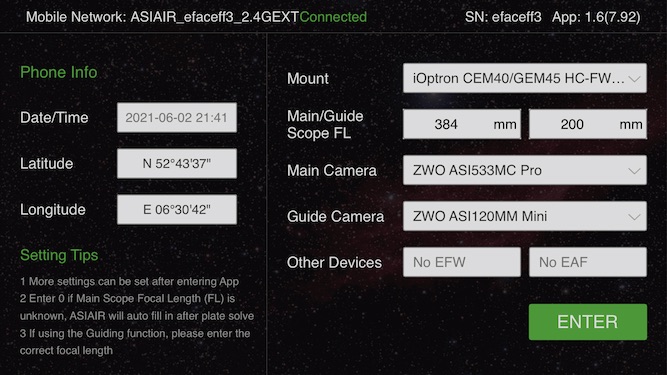
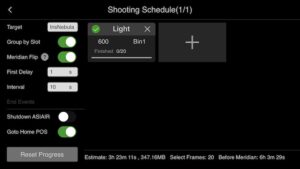
– May already specify the name of the project and the sequence in Autorun
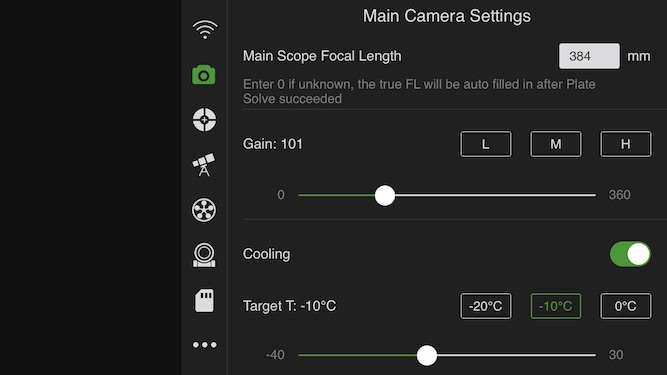
– Start cooling the camera to 0 degrees Celsius (if it was hot during the day, do not rush, wait till it cools a bit)
– When it is getting darker, go to -10 degrees
– Keep an eye on the power of the cooler, do not push things!
– Check the camera gain (we usually use 101 for broadband, 240 for narrow-band)
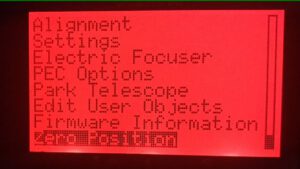
– IMPORTANT: Before doing anything with the telescope, define the zero position for the mount; otherwise, you may be *very* surprised when you order the scope to slew to a target, because it may start slewing in the opposite direction like you are on the other hemisphere (pointing to the North is a natural choice, use that as zero position)
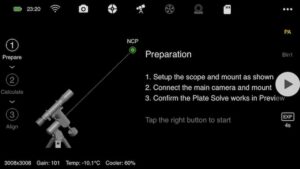
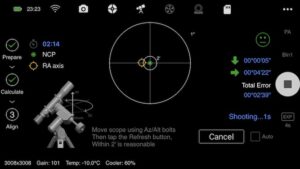
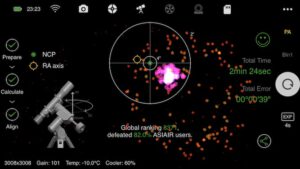
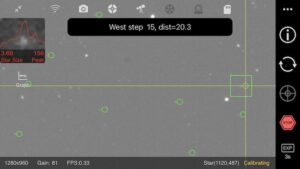
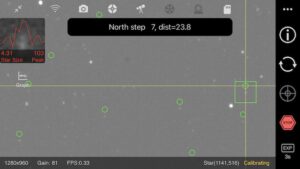
Polar alignment
– When Polaris is visible, start the polar alignment; good initial position is important
(we assume the scopes are/near well-focused already, to make relatively sharp images)
– If it is possible, go to -20 degrees (or whatever your camera allows)
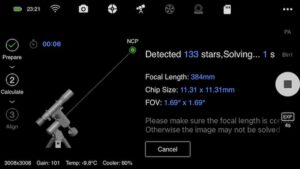
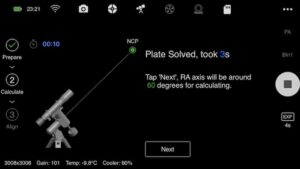
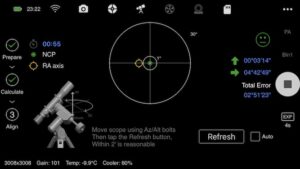
– Get the RA axis within 2 arcminutes of the pole; optional: beat most of the ASIair users in speed! 🙂
A few seconds of integration is usually fine. After Plate Solving (identifying the stars and the telescope orientation) the mount will rotate 60 degrees; repeat shooting and Plate Solve, and the ASIair Pro will guide you in refining the mount’s orientation.

– Tighten the screws of the mount axes!
– Go to the zero position (to check if it was set as intended)
Find a star
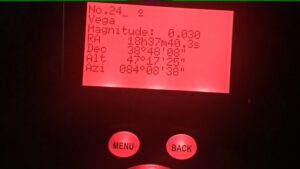
– Select a bright star not too far from your target, and slew the telescope there
(with a GoTo telescope, just select a bright star near the target position by name)
– Go to the preview and make a shot of 10-30s
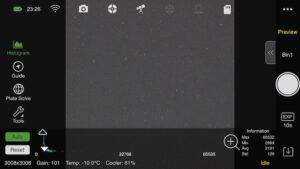
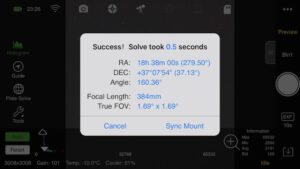
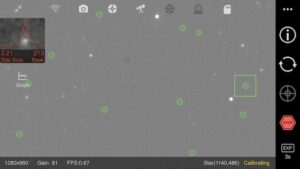
– Use the Plate Solve option of the ASIair to find out where you are pointing at
– Sync to the mount (if it doesn’t succeed, maybe the mount is no longer connected to the ASIair unit)
– Select and slew again to the star; in preview, it should show up in the center
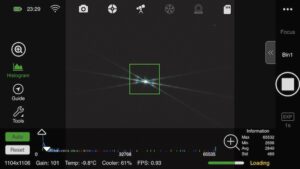
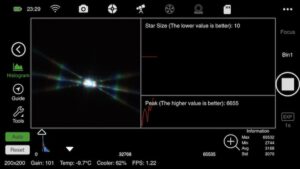
Get in focus
– Unscrew the cap and place the Bahtinov mask on the telescope
– Losen the screw keeping the focus tight
– Start making shots in the focusing option, use a few seconds of integration time
– Get the focus perfect (use the zoom-in option in the ASIair app), and tighten it
Guiding
– Remove the Bahtinov mask, and move to the target
– Make a preview shot and check the framing (may need a bit longer exposures)
– Adjust framing if necessary – this is actually quite important for a good image
– Start streaming images from the guide scope, use a few seconds at most
– Select guide star [obsolete, multiple guide stars are used in latest versions], start the calibration


Starting your session
-IMPORTANT: if moving to a new target, clear the calibration information and start that process again (this will save you a lot of trouble; in the beginning, we lost a lot of precious time because the telescope didn’t; track the new target
– When guiding has started and things look stable (residual errors are within a few arcsec and stable), you may start the imaging session
– Avoid starting a run on a target near the meridian flip position (when a target is in its highest elevation/appears to the South)
– Finally, you may begin your astrophotography session with the ASIair Pro!
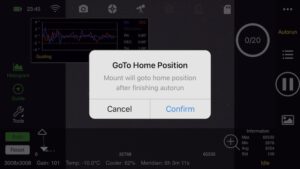
– Start autorun, normally with the slewing to zero position option at the end
– Keep the expected shooting end time in mind, you should finish before dawn (add at least half an hour if there is a meridian flip during the night)
Additional advice
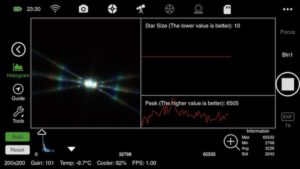
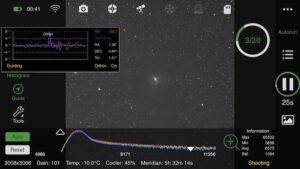
– Always use the <DITHERING> option, i.e. automatic shift of the target position by a few pixels by every integration (see the left picture above for the effect on guiding); this will help calibration since bad pixels will fall on different places in the individual images
– We find an extreme version of this very useful, when the field of interest is small and we have a few nights available for the same target; moving the image center position around night-by-night will help to naturally smoothen larger-scale image imperfections (due to dust on the filter for example), acting a bit like flat-field correction
– Enjoy the rest of your night, but be alert in case weather changes may be expected.
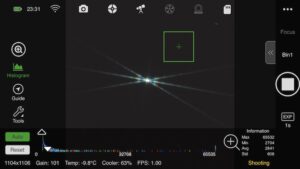
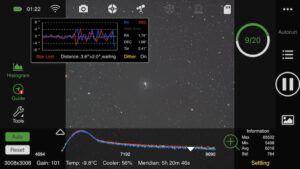
– IMPORTANT: if your guide parameter settings are not ideal (or weather conditions change, as in the picture to the right above), the sequence may take much longer than expected (or guiding will stop completely); you may need to adjust the criteria for telescope settling (or even abort the shooting, as we did in the above example)
– Astrophotography with ASIair Pro is fun!